Sunday, September 7, 2014

Deco Mesh Wreath Tutorial

Deco Mesh Wreath in Fall colors !

First, choose a wire wreath size and deco mesh 
(preferrably 5-6" in width, not large rolls)
3 rolls of mesh is what I use for the fullness.


You will also need 6 pipecleaners. One to twist-tie
the beginning and one for the end of each roll of mesh.


Twist it tight!


Now for the tricky part!


Imagine numbering the spaces between the wires.
3 spaces


Push a loop of mesh through one of the spaces.
It can be any size desired.
(It also doesn't need to start in any specific loop number)


Push another loop through the 2nd space.


Then the 3rd space. You should have three loops now
in all three spaces straight across.


Continue working loops through the spaces in a pattern (or random)
(I prefer 1-2-3-1-2-3-1-2-3)
And it should look similar to this..


At the end of the roll of mesh,
 tie it tight with one of your pipecleaners.

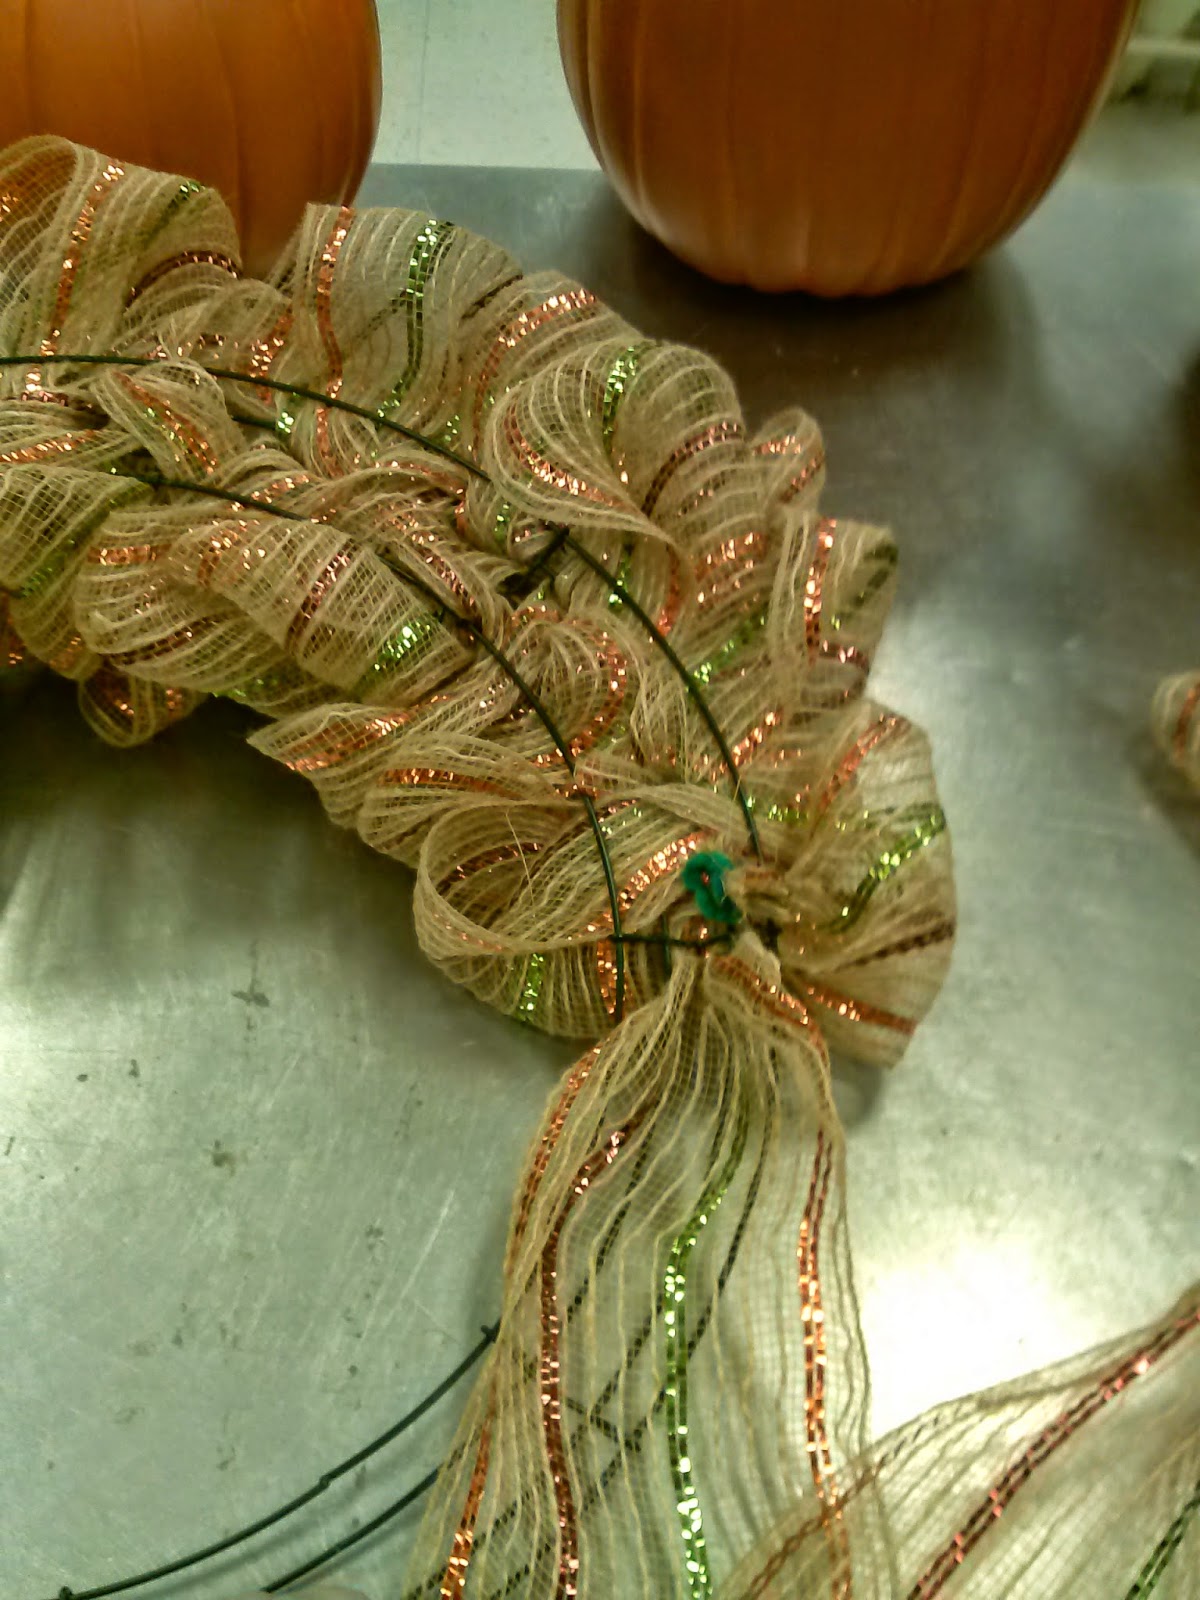
If you turn it around to tie it off, 
it should look like this from behind.


To see the finished product, follow me on Pinterest @ Christina Pavlick


Sunday, August 3, 2014

Formal Bow Tutorial

How-to guide for my Formal Bow (IN PICTURES!)
Made with Bowtastic Bowmaker
Halloween Ribbon <3
Also, sorry for the poor quality..


Choose your ribbon combination! I like to secure mine with a drop of hot glue
for an extra neat, clean finished product. You can also just use one ribbon,
wired ribbon preferred, but not required.

Start with the ribbon facing down, with about 2 or 3 inches of room at the end of the ribbon.
Twist the ribbon tightly in the center before you press down for the bowmaker to hold.
Continue this pattern, being sure to make each loop symmetrical. I like to do 3 loops of the same length, on each side, before we make smaller loops for the front of the bow.

This is how your bow should look on one side when you finish 3 loops and make a smaller loop.
My 'Formal looking' bows have 3 large loops, 2 medium loops, and a small loop last.


When I'm happy with the look, I slide the bow off the bowmaker, tightly pinching the center together, and secure with a pipecleaner. Tighthly twist the pipecleaner in place a few times.


I take (usually the last of the roll) of ribbon, and wrap it neatly around the center of the bow to conceal the pipecleaner.


Cut the ends off and you're ready for fluffing!
Pull the loops out two at a time, on each side starting with the largest. I alternate largest on each side, then medium on each side, then the small one in the center. It gives it a balanced, clean finish.


Thank you for reading, and Pinning! <3
Follow me on Pinterest @ Christina Pavlick!